Sep 12

Server 2012 R2 Core, Minimal GUI, GUI

SO, what are all the options with core?  What is “minimal  GUI”?  How do you move from one to the other?

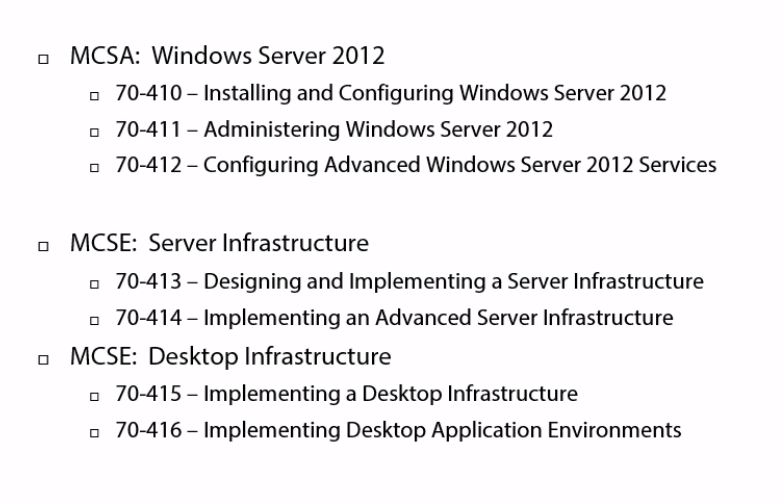
I wanted to post to outline these options as this understanding will probably be included on several questions in the 70-412 or 70-417 tests.

There are THREE options for the interface on Server 2012.

From the most basic, to the most features, they look like this;

  1. Server Core – always installed and enabled; the baseline feature for all Windows Servers. This includes the fundamental capabilities that cannot be removed and are core to the OS.
    1. What you get; ONLY command prompt (Powershell)
  2. Minimal Server Interface; Server Graphical Management Tools & Infrastructure – functionality for Minimal Server Interface;
    1. What you get; Server Manager and command prompt, and MMC
  3. Server Graphical Shell – equivalent to Server with a GUI
    1. What you get; this is the full GUI interface that most Administrators work with

Link to overview and diagram shown below.

Server 2012 GUI Layers

Server 2012 GUI Layers


We are going to demonstrate scenarios with VIDEO

  1. Starting with Server Graphical Shell (normal full blown GUI)
    1. We remove the Graphical Shell, which takes us to MINIMAL SERVER INTERFACE.  Then we return to the Server Graphical Shell.
      1. Link to video going from Server Graphical Shell to Minimal Server Interface, and back. Also looking at the tools in Minimal Server Interface, and how you restart your tools if you close them all and are looking at a black, blank desktop in Minimal Server Interface.
      2. https://youtu.be/O1mNgwzUewQ 
    2. We remove Graphical Shell and minimal interface and go directly to CORE, then we return to Graphical Shell
      1. This command gets you from CORE to Minimal Server Interface; Install-WindowsFeature Server-Gui-Mgmt-Infra
      2. Add this command as well, and you go back to full Server Graphical Shell; Install-WindowsFeatureServer-Gui-Shell 
      3. So, to go from Core back to Server Graphical Shell in one step, this is your command; Install-WindowsFeature Server-Gui-Mgmt-Infra, Server-Gui-Shell
      4. Link to video going from Server Graphical Shell to Core, and back. Also looking at the tools in Core, and how you restart your tools if you close them all and are looking at a black, blank desktop in Core.
      5. https://youtu.be/sAwOOpuD4mA
Jul 30

Windows Server 2012 R2 (70-412) File and Storage Solutions – Study Guide

Prepare yourself for the Microsoft MCSA 70-412 exam. This course explores how to implement an advanced DHCP solution, implement an advanced DNS solution, and deploy and manage IP Address Management.

These notes are my personal notes from the FREE training on Pluralsight. You can get your FREE signup through technet/MSDN or Dreamspark. The title of this course is exactly the title of this post. These notes are from this specific course only. I use these as a refresher Study Guide. POWERSHELL topics and2012GregShieldscmdlets are in purple. I have a few notes with the “DEMO” each time the training included a DEMO just so you can see how many demos there were which were really helpful. Thanks to Greg Shields @ConcentratdGreg, the trainer, contact info at the end.

“Storage” – think more than just file server.

  1. Configure and Optimize Storage
    1. Configure Storage Spaces
      1. local disks
      2. create a Storage Pool
      3. all storage shows up (unused and available) in the PRIMORDIAL POOL
      4. new storage pool wizard
        1. during wizard can allocate “automatic” but can choose “manual” or “hot spare”
        2. leave it as automatic, can set RAID
      5. Then create a disk out of the storage pool. Then can create volumes on those disks as well.
      6. storage tiers checkbox is grayed out as tiering is not set up.
      7. can set simple/mirror/parity (RAID) in this wizard
      8. next button lets you choose thin or fixed provisioning.
      9. after creation, then create a volume on the new disk
      10. can enable data deduplication in next field (have to turn on the ROLE)
        1. general purpose or VDI de-dupe
        2. can choose exclusions, schedule, etc. Throughput optimization.
    2. Configure Tiered Storage
      1. Start with creating a new storage pool. Has the different type disks (SSD and spinning)
        1. (hack to create each with VMware workstation)
          1. Get-PhysicalDisk
          2. Get-PhysicalDisk | ft friendlyname,size,mediatype
          3. can set them in PS to be and appear as SSD or mechanical
          4. Set-PhysicalDisk -mediatype HDD
          5. So essentially you are setting them to have some SSD and some HDD so you can set up tiering.
        2. Now you have a different option in the wizard (Faster tier, Standard tier)
        3. the tiering is handled by the windows subsystem, no mgmt
        4. can set specific files to SSD by PS; Set-FileStorageTier
    3. Implement Thin Provisioning and TRIM
      1. we already talked about creating THIN
      2. tiered is THICK – cannot do THIN tiered
      3. see if THIN provisioning fits your needs
      4. TRIM – file delete notification. reclaim storage space. File Delete Notification is ON by default.
      5. disable file delete notification by registry setting if you want as it does add some overhead.
      6. PS Optimize-Volume
    4. Configure iSCSI Target and Initiator
      1. provides a method for any of the above disks accessible over network
      2. Target = where storage is, Initiator is who needs the storage,
      3. Configure; easier to create the initiator first (the remote network server)
        1. tools/start iSCSI initiator get alert box to start service each time
      4. iSCSI console
        1. quick connect option might not be the best for enterprise use
      5. you have to click the ADVANCED button to choose adapter and initiator IP (critical when using a separate storage network)
      6. at this point, we haven’t create the storage target on the fileserver yet
      7. new iSCSI virtual disk wizard
        1. create new iSCSI disk name, size, dynamically expanding, etc.
        2. next screen asks for target name, and the previously created one shows up. (which is why we created it first)
        3. can enable CHAP authentication
        4. “CONNECT”, then go to ADVANCED to verify IP, network, etc. If you don’t specify the right network, you could end up sending storage traffic over your production network.
        5. the remote server shows the disk just like it was a local disk, needing brought online, format, etc.
        6. PS commands for iSCSI
          1. Connect-IscsiTarget
          2. Disconnect-IscsiTarget
    5. Configure iSNS (Internet iStorage Name Service Server)
      1. used to simplify management of complex and large iSCSI setups (who is that?)
      2. registers initiators
      3. to register targets, you need PS command Set-WmiInstance -namespace root\wmi -Class WT_iSNSServer -Arguments @{ServerName=”actual server name”}
      4. after that, initiators and targets both show in iSNS console
    6. Manage Server Free Space using Features on Demand.2012SpecifyAlternateSourcePath
      1. basically allows you to remove unused roles to save space.
      2. this gives you the Specify Alternate Source Path window (screenshot)
      3. this is a good article to show where it searches.
      4. you can create a “feature file store” and put it on the network. it’s the SXS folder.
  2. Configure Advanced File Services
    1. Configure a NFS file datastore
      1. NFS more interested in computers not users
      2. “Server for NFS” ROLE (under file server)
      3. New NFS Sharing tab on share properties
      4. incoming client settings, permissions (which machines)
      5. by DEFAULT all machines have read access, and root access is disallowed.
      6. PS NfsShare, Get-NfsShare, etc.
    2. Configure file access auditing
      1. 50 new sub-categories, but same way to set up as previously
      2. Group Policy or local security policy
      3. 9 different original policies. Audit Object Access. Typically this is how we used to turn this on
      4. “Advanced Audit Policy Configuration”
      5. SACL; auditing view on file/folder properties, now you can also add CONDITIONS.
    3. Configure BranchCache
      1. transparent; cache documents in remote locations. I.E., branch offices. Bandwidth was historical a reason. Used to need Enterprise Windows versions, limiting it’s use. Now any version of Windows 8 works. Turn it on and don’t think about. File server, web server, or BITS data.
      2. First access of document initiates the copy to the branch.
      3. Distributed Mode (stores on desktop machine) or server based Hosted Mode.
      4. file is split into chucks that are hashed then only changed chunks are updated.
      5. One piece only does files, different piece does Web and BITS. These are in different places in FEATURES
      6. Turn it on via GPO, choose hash type, configure client side “turn on branch cache”, set hosted cache server name, set cache expiration, etc.
      7. You can pre-populate bia PS Publish-BCFileContent, Export-BCCachePackage
  3. Implement Dynamic Access Control (DAC) DAC is supposedly heavily represented on 70-412 and 70-417 tests. Here is a great example and scenario about how to use DAC in a real-world situation, from the Microsoft Storage Team; http://mints4.rssing.com/chan-3739609/all_p2.html
    1. Addresses file permissions getting lost/changed during file moves. New security requirements also drive this advancement in security.
      1. needs to have characteristics set in AD
      2. Also settings on file servers.
      3. Scenario; you can filter all documents for SSN, and then disallow anyone from viewing such document unless the user is in certain group, site, etc.
      4. Can filter and scan files as they are updated (SSN added to file that did not previously have one)
      5. Think big IF THEN statement; IF this user is in FINANCE group, AND user is in DENVER, then allow read/write/etc.
      6. DAC scans documents regularly to keep up with changes.
    2. Configure User and Device Claim Types
      1. Install File Server Resource Manager ROLE (screenshot)2012FileServerResourceManager
      2. CLASSIFICATION tab in properties on your file server now.
      3. Active Directory Administrative Center (different from ADUC) has DAC
        1. Trying to get steps in order here;
        2. create claim types in ADAC for USERS
        3. Resource properties for files set up in ADAC / DAC console. Some examples built in are; Personal Use, Project, Intellectual Property, Immutable (?), Department, Compliancy, Personally Identifiable Information, etc. Then there are different values; NOT PII, Public, Low, Moderate, High, and you can create/edit values. These are set up then used later in AD to apply to files and folders
        4. Resource property lists ( add resource property to global) This is just a container of resource properties. Grouping these makes it more manageable to attach to documents. To use this, use PS Update-FSRMClassificationproperyDefinition, which enables the property list. Now it shows up on folder/share/file “Properties” as a new TAB. Users aren’t going to use this manually very much so you have to use server options; screen templates, file screens, classification management. This is the first step to determine what type of content you’re looking for in files / folders. You can scope to specific types of files; user files/ backup files, application files, etc. Scope this down to only the ones interested in, or you can get into resource issues. After picking scope, then choose the TYPE of classifier; for this a “content classifier” which looks at file content. Then you set the content classifier to “high, low, etc.” to apply that to hits that it finds. then you build the classification parameters which are detailed search expressions. you can look up the patterns on the internet or wherever like this one for SSNs.  Now schedule to determine when and how often it searches. Check-box ” enable fixed schedule” then choose the times/dates/recurrence. You CAN force it to “run now” to see if it works. It allows logging and post scan reports. When if finds a HIT, then it actually will show as an updated “properties” tab on the file. You also can configure email request assistance and notification for remediation.
        5. Create new central access rule. This is in ADAC / DAC to set up how you want to apply the settings above to control access based on the detail above. Generally apply to “authenticated users” , they get access when certain defined conditions exist; user is in Kansas City, and belongs to HR, etc.
        6. Create central access policy is how the rule above gets applied to file servers. Then use Group Policy to deploy. New GPO for DAC policy. This would apply to File Servers. Then go back to properties on the share/folder and there is a “Central Policy” tab that you have to choose the policy.
        7. I guarantee this is a test question that MS uses. Keep in mind test questions are random so it might not be on EVERY test, but it’s on one I took.
    3. Implement Policy Changes and Staging
    4. Create and Configure Resource Properties and Lists
    5. Configure File Classification
    6. Perform Access Denied Remediation
    7. Create and Configure Central Access Rules and Policies
Jul 11

Windows Server 2012 R2 (70-412) Continuity and Disaster Recovery – Study Guide

Prepare yourself for the Microsoft MCSA 70-412 exam. This course explores how to implement an advanced DHCP solution, implement an advanced DNS solution, and deploy and manage IP Address Management.

Videos at the bottom (WinRE)

These notes are my personal notes from the FREE training on Pluralsight. You can get your FREE signup through technet/MSDN or Dreamspark. The title of this course is exactly the title of this post. These notes are from this specific course only. I use these as a refresher Study Guide. POWERSHELL topics and2012GregShieldscmdlets are in purple. I have a few notes with the “DEMO” each time the training included a DEMO just so you can see how many demos there were which were really helpful. Thanks to Greg Shields @ConcentratdGreg, the trainer, contact info at the end.

All, or nearly all, sections include DEMOS so I’m not notating that separately.2012TrainingRecommendedOrder

These training courses should be preferably taken in this order (screenshot).

  1. Configure and Manage Backup Solutions
    1. Configure Windows Server Backups FEATURE
      1. Compared to NT backups, this focuses on VOLUMES.
      2. Pretty fully featured technology today.
      3. If you want to do Bare Metal backups, you need to check that along with System State, System Reserved, and probably the C or OS drive.
      4. Advanced settings
        1. excluded files
        2. VSS settings
          1. copy vs. full (are you using some other backup application, if so you use COPY)
      5. Destination
        1. local volume
        2. remote shared folder
        3. Optimize backup performance = types of backups (full, incremental, etc.)
      6. POWERSHELL WB = Windows Backup
      7. Get-WBJob
      8. Stop-WBJob
      9. Get-WBVSSBackupOption
    2. Configure Azure Backups
      1. designed to just get a back up into the Cloud
      2. Create “Backup Vault” tied to subscription and choose location
      3. Download Vault credentials, and download and install Azure Backup Agent
      4. Is now called MICROSOFT Azure Backup NOT Windows Azure Backup
      5. set up encryption; Microsoft cannot recover data
      6. Azure looks almost the same as a Windows backup. File and folder; just data, not system restore.
    3. Configure role-specific backups
      1. Backup Operators is the default, maybe too many permissions for many cases; can shut down system.
      2. Create your own role for backup files and directories and restore files and directories
    4. Manage VSS settings using VSS Admin
      1. extended from original design (previous versions for users) to now include backups (quiescence)
      2. VSS writer (specific by vendor for the application, Exchange, Oracle, AD, SQL, etc.
      3. the VSS requester is the partner to the writer
      4. PS vssadmin list writers
      5. vssadmin list providers
      6. vssadmin add shadowstorage /for=c: /on=f: /maxsize=20% set location for VSS
      7. vssadmin create shadow /for=c:     create vss shadow copy, very quick nearly instantly
      8. vssadmin can remove, revert, etc.
  2. Recover Servers (restore)
    1. individual file or folder recovery
      1. backup from – choose location, then choose files and folders (other choices volumes, applications, system state, or virtual machines)
      2. can put back in same, or different location
    2. Bare metal server recovery
      1. boot into WINRE (WINdows Recovery Environment) and also here; Tom’s Guide; when to use RE
        1. one option is to use shutdown command shutdown /r /o /t 02012NewShutdownSwitches (Check out Windows 8 new shutdown switches here)
        2. the /o is a new switch
        3. This is a gui based windows recovery console. Allows you to find the system image, install drives, connect to network locations to find image. Do you want to repartition drives.
        4. Don’t even need DVD media.
        5. Here is a link to a video of the WINRE console.
        6. The F8 replacement is WINRE
        7. msconfig – set what startup you get for NEXT boot to boot into safe mode, AD repair, etc. In case boots are so fast you can’t see F8
        8. you can also boot to windows DVD
        9. From WINRE you can boot to command prompt view, and you can manipulate unmounted drive (OS is not mounted). You can tell because command prompt is on the X drive which is the WINRE OS
          1. startrep (start repair scan)
          2. bootrec (boot record repair) Fixmbr, Fixboot, ScanOS, RebuildBcd
          3. Advanced boot options (looks like the F8 options)
            1. safe mode, with networking, with command prompt, boot logging, debugging, low-resolution video, last known good, disable restart, disable early launch anti-malware etc., etc.
        10. Configure the boot configuration data store
        11. multi boot menu to offer recovery options (not multi os boot)
          1. bcdedit
          2. bcdedit /export c:\save (export and save config)
  3. Configure site level fault tolerance
    1. Configure Hyper-V Replica, including Replica Broker and VMs
      1. Replica is NOT failover clustering
      2. provides a way to keep another copy of VM files (usually at remote site)
      3. Replica CAN work with failover clusters
      4. Replica is NOT OS specific; you can set it up with just shell VM, no OS to prove it
      5. Kerberos – not encrypted traffic, requires trusted AD
      6. certs – encrypted, no trusted domain needed
      7. set up on each VM individually
      8. configure frequency
      9. can also set up scheduled recovery points
      10. VSS for application consistent recovery points
      11. you can do the initial replication via external media, network, choose other machine, etc.
      12. set failover TCP/IP
      13. on the TARGET location server there is “test failover” under network adapter in Hyper-V Manager
      14. PLANNED failovers all start from the SOURCE location
      15. UNPLANNED start from Destination location (thought is that the source location is down, or offline)
      16. Adding Replica to Failover Cluster, need to
        1. Need to add the Hyper-V Replica Broker ROLE
    2. Configure Multi Site Clustering, including network settings, Quorum, and Failover Settings
    3. Configure Hyper-V Replica Extended Replication
      1. create a second replication site
      2. this is initiated from the TARGET location of the original source.
      3. most other stuff is the same
    4. Configure Global Update Manager
      1. https://technet.microsoft.com/en-us/library/dn265972.aspx#BKMK_GUM
      2. When a state change occurs such as a cluster resource is taken offline, the nodes in a failover cluster must be notified of the change and acknowledge it before the cluster commits the change to the database. The Global Update Manager is responsible for managing these cluster database updates. In Windows Server 2012 R2, you can configure how the cluster manages global updates. By default, the Global Update Manager uses the following modes for failover cluster workloads in Windows Server 2012 R2:
    5. Recover a Multi Site Failover Cluster
      1. make sure you can support the IP and network configuration in the failover site
      2. same Cluster Manager is used to manage stretch (multi site) clusters
      3. configure preferred owners to deselect the DR site
      4. QUORUM
        1. node and file share is preferred
        2. even number of hosts per location preferred
        3. Force start without a quorum; https://msdn.microsoft.com/en-us/library/hh270275.aspx
Jun 27

Windows Server 2012 R2 (70-412) Configure Network Services – Study Guide

Prepare yourself for the Microsoft MCSA 70-412 exam. This course explores how to implement an advanced DHCP solution, implement an advanced DNS solution, and deploy and manage IP Address Management.


These notes are my personal notes from the FREE training on Pluralsight. You can get your FREE signup through technet/MSDN or Dreamspark. The title of this course is exactly the title of this post. These notes are from this specific course only. I use these as a refresher Study Guide. POWERSHELL topics and2012GregShieldscmdlets are in purple. I have a few notes with the “DEMO” each time the training included a DEMO just so you can see how many demos there were which were really helpful. Thanks to Greg Shields @ConcentratdGreg, the trainer, contact info at the end.

All, or nearly all, sections include DEMOS so I’m not notating that separately.


  1. Implement an Advanced DHCP Solution
    1. Create and configure superscopes and multicast scopes
      1. superscopes – combine multiple DHCP scopes to have broader range of addresses
      2. initial subnet didn’t have enough addresses
      3. when you run out of addresses;
        1. define by geographical location; floor, building, city, etc.
        2. assign multiple network IPs to router (downside is network admin involvement)
        3. DHCP RELAY – we’ve been there…allows DHCP traffic to cross router
        4. DEMO
          1. In DHCP, create superscope, then add multiple scopes to it
          2. Multicast scope –
            1. create Multicast scope, pick start/end IP, set TTL
            2. unlikely would be allowed on most modern networks
            3. most common use is WDS or other desktop deployments
    2. Configure DHCP filters and policies
      1. nodes in DHCP mmc
        1. filters; allow or deny by MAC
        2. then have to “enable” by checkbox
        3. can set exemptions
        4. Policies; what options will the managed machines get
          1. vendor class
          2. MAC
          3. FQDN
        5. Then set what treatment those hosts that fit the policy actually get
    3. Implement DHCPv6
      1. Not a lot of real world use yet
      2. NOT very simple
      3. built into IPv6 can auto assign anyhow. Don’t believe it read this article…IPv6 address autoconfiguration
      4. This would be used for anything beyond what the protocol can do.
      5. CANNOT assign a default gateway
      6. CAN assign most other options
      7. NOT really needed for auto assignment, more used for address control
      8. DEMO
        1. click on IPv6, right click “new scope”
        2. etc. pretty much like IPv4
        3. beware of test questions about WHY you would use it.
    4. HA for DHCP – failover and split scopes
      1. split scopes (the old way)
        1. 80% / 20% is the most common (I’m sure I’ve seen test questions that said that was wrong though).  Well the 80/20 split scope is Microsoft best practice see here.
        2. Can be messy recovering from a server outage; the DHCP databases don’t know anything about what the other one is doing.
      2. DHCP Failover
        1. one DB
        2. can use 100% of scope
      3. DEMO
        1. split scopes (split scope configuration wizard)
        2. DHCP Failover
          1. per scope
          2. “Configure Failover”
          3. set load balance or hot standby and some other settings
          4. you can enable message authentication via shared secret
          5. Configure DNS registration, can discard as well
    5. DHCP Name Protection2012DHCPNameProtection
      1. mainly for non-windows computers (screenshot)
      2. prevents non-windows from registering a name that is already in use.
    6. DNS Registration
        1. Configure DNS registration, can discard as well
  2. Implement an Advanced DNS Solution
    1. Configure Security for DNS, including DNSSEC, DNS Socket Pool, and Cache Locking
      1. DNSSEC does not necessarily require certs.
      2. To enable you “sign” the zone.
      3. Key Master is the authoritative DNS server that generates and manages the key for the zone.
      4. when you create the new key, then you have all kinds of options
      5. Needs to be AD integrated zone
      6. KSK – Key Signing Key and ZSK – Zone Signing Key
      7. Trust Anchor (for authenticating non-authoritative server
      8. Then GP is used to tell clients to ask for the DNS key
      9. “name resolution policy”, checkbox for enable DNSSEC
      10. create rules to determine who it applies to
      11. DNS Socket Pool (in response to Kaminsky attack DNS vulnerability)
        1. randomizes the SOURCE PORT to not be using TCP/53 and UDP/53
        2. enabled by default, but you tweak settings like number of ports
        3. DnsCmd /config /socketpoolsize 100000
        4. DnsCme /info /socketpoolsize
      12. Cache Locking
        1. Locks cache after update in cache.
        2. cannot be overwritting by a percentage of TTL
        3. default is 100% of TTL
        4. DnsCmd /config /cachelockingpercent 50
    2. Configure DNS Logging
      1. two places it can be configured depending on what you want
      2. event logging (1)  goes into event logs
      3. debug logging (2) goes into file
    3. Configure Delegated Administration
      1. under “security” tab
      2. for you to delegate activities, you MUST have AD integrated zone (test question?)
    4. Configure recursion
      1. disabled by default
      2. servicing servers outside your network
      3. should be ON on external server to prevent DNS attacks
    5. Configure Netmask ordering
      1. common use – WSUS
      2. essentially allows DNS server give a client an address that corresponds to the subnet that they are in. For traveling users.
      3. First response goes to server with same subnet
    6. Configure Global Names Zone
      1. for needs that used to be handled by WINS
      2. short name resolution
      3. create a zone called “GlobalNames”
      4. will contain short names
      5. you have to explicitly enable on all DNS servers
      6. dnscmd servername /config /enableglobalnamessupport 1
    7. Analyze Zone level statistics
      1. Get-DNSServerStatistics -zonename company.local
      2. DNSLint
        1. graphical display of internal/external on .htm file
        2. dnslint 
  3. Deploy and Manage IP Address Management – IPAM
    1. Provision IPAM via manual or GP
    2. IMPORTANT NOTE: to change  the IPAM provisioning method (like from manual to automatic) you must UNINSTALL and REINSTALL!
      1. install FEATURE
      2. configure from Server Manager
      3. choose database (internal or SQL)
      4. GPO Name prefix (manual configuration of IPAM is tedious and not recommended)
      5. run PS command Invoke-IpamGpoProvisioning -Domain ….creates the Group Policies and links them.
      6. Run IPAM server discovery
      7. Choose the ones you want and set them to managed.
        1. managed servers need to show up in “security filtering’ box on the GPO
        2. machine has to receive and apply the GP before it shows as “unblocked” and “managed”
        3. IPAM is more of a “push” instead of pulling in existing IP use
        4. IP Address block
          1. 1 or more IP ranges
        5. Add address range (block of IPs or open range that IPAM can use)
        6. can add reservations and VIPs
        7. along with normal DNS, gateway and other information
    3. Configure server discovery
    4. create and manage IP blocks and ranges
    5. migrate to IPAM
      1. tasks / import IP addresses (imports from .csv). certain mandatory columns for IPAM imports – IPAddress,IPAddressState,AssignmentType,ManagedByService,ServiceInstance,AssetTag
    6. monitor utilization of IP address space
      1. lirrlw pie chart by each range, can be adjusted for the entire server
    7. delegate IPAM administration
      1. there is an “ACCESS CONTROL” link on the very bottom left to set up roles and access.
      2. several default roles but you can create your own customized roles and set the policy settings
    8. Manage IPAM collections
      1. request new addresses (fine and allocate) “find next”
      2. RECLAIM ip addresses that are no longer used, delete resource records and DHCP reservations if exist.
      3. EVENT CATALOG – log viewer of IPAM events
      4. ADDRESS RANGE GROUPS – group by custom fields you defined during IP creation
    9. configure IPAM database storage
      1. PS Move-IPAMDatabase (moved internal IPAM DB to SQL if you want)
      2. lots of IPAM powershell commands (automation possibilities)
Jun 24

How to create RDM mappings for SQL Clustering with MSCS on VMware 6.0

How to create RDM mappings for SQL Clustering with MSCS on VMware 6.0

Using vSphere 6.0

For the sake of this discussion, we’re building two VMs for use in a two node failover MSCS cluster for SQL 2012.  We’ll simply call them A and B.

We will be using the Web Client for this, since that’s the direction VMware is pushing. However, the Fat (C#) client is faster for this task as it takes fewer steps.  For example, on the fat client, when you create the first RDM mapping, it will automatically create a new, second SCSI controller. When on the web client, you have to manually create the SCSI controller first, then start building the RDM drives.

The documentation in the 6.0 documents is very sparse, and I don’t think it’s even complete or accurate so this took a bit of effort to figure out and get set up.

Add a new SCSI Controller (we had issues with other “types” and use VMware Paravirtual exclusively now)
mscs2mscs1

Add a new disk;
mscs3Select the target LUN by LUN ID;
mscs4

Choose your new SCSI controller 1 (not like picture) and pick an unused SCSI ID.
mscs5


This shows the proper SCSI controller and ID selection.
mscs6

After creating this, go to the Windows OS on A, bring disk online, initialize, format, name, label, etc.

Now go to server Node B and add a RDM pointing to that exact same file.
mscs7

You told it to store the VMDK pointer “with the server” so go to that datastore and fine the VMDK that was created by the new drive creation on A. When you create this drive in VMware on B, then you can go into the OS on the B node and the drive should show up there labeled and formatted and drive lettered.

If you keep track of it as you go, you can add several drives at once on A (2,3,4,5,6,7…) and it will create them all at once, then go over to B and add/create them all at once. But you have to keep your VMDK names and LUN IDs straight so you know which one is which. Doing one at a time is slower but less confusing.


How to tell (after it’s created) which VMDK file a new RDM is using on A, so you can find the correct VMDK when you create B;

Go to “Edit Settings” then at the top there is a “Manage other disks”
mscs8

Open that button, then drop down the details on the disk you’re looking at and it will show you the VMDK and datastore. This VMDK is just a “pointer” or “mapping” file to the LUN.
mscs9

mscs10

mscs11

Pick the SAME SCSI controller and port that you did on A;
mscs6
ISSUES ENCOUNTERED;

Set LUNS as “perennially reserved”.  If this is not set right, the ESX HOST will take HOURS to boot, depending on how many RDMs it has to scan. Ours took 2.75 to boot. When this was set right via esxcli, they would boot in about 6 minutes, counting the HP specific boot processes. This is addressed in this KB, scroll down to the “perennially reserved” section. ESXi/ESX hosts with visibility to RDM LUNs being used by MSCS nodes with RDMs may take a long time to start or during LUN rescan (1016106)


EXPANDING RDM sizes. 

PARAVIRTUAL driver

Jun 16

Windows Server 2012 R2 (70-412) Configure Active Directory – Study Guide

These notes are my personal notes from the FREE training on Pluralsight. You can get your FREE signup through technet/MSDN or Dreamspark. The title of this course is exactly the title of this post. These notes are from this specific course only. I use these as a refresher Study Guide. POWERSHELL topics and2012GregShieldscmdlets are in purple. I have a few notes with the “DEMO” each time the training included a DEMO just so you can see how many demos there were which were really helpful. Thanks to Greg Shields @ConcentratdGreg, the trainer, contact info at the end.

  1. Introduction
    1. Not about the basics, this is 412 training so the basics should be in place
    2. Multiple Forests, multiple domains
    3. Configure a Forest or Domain
    4. Configure Trusts
    5. Configure Sites (remember from an era when WAN connectivity and site replication was expensive)
    6. Manage Active Directory and SYSVOL Replication
      1. RODC
  1. Configure a Forest or Domain
    1. implement multi domain and multi forest AD, with interoperability with previous versions of AD.
    2. Upgrading existing domains and forests, including preparation and functional levels
    3. Configure multiple UPN suffixes
    4. Used to require contiguous namespace; contoso.com, denver.contoso.com, paris.contoso.com.
      1. now we can use DISJOINTED namespaces. can have a forest with the following domains;
        1. contoso.com
        2. denver.contoso.com
        3. widget.com
        4. This is called a TREE DOMAIN (as in “forest”, “trees” I suppose….) vs. the old
          2012TreeDomain

          TREE (disjointed) domain

          CHILD DOMAIN

    5. When would you want to use a multi domain structure (desired state now is to minimize)?
      1. habit essentially
      2. political or organizational
      3. Autonomy (separation)
      4. Data isolation
      5. Segregation for replication /authentication /authorization
      6. SECURITY is not one of the reasons as part of the same forest.
    6. Multi Forest structure
      1. when two forests merge (purchase a company, etc.)
      2. two forests connected by a TRUST of some sort.
      3. Trusts require MANUAL creation
      4. Different requirements for AD Schema can dictate multiple Forests
      5. Exchange Organizations (In Exchange, only allowed one, so if your Exchange needs require more, then you are multi forest)
    7. Permissions required for creation
      1. To build a new forest, Local Admin on first DC (there is no AD yet)
      2. To build a new domain tree or child domain, you must be Enterprise Admin
      3. To add additional DCs, you must be a Domain Admin
    8. Upgrade Process for Domain or Forest (know this process)
      1. get healthy (make sure everything is working right)
      2. extend the schema (essentially adding columns to AD database, or new characteristics or fields) (ADPREP)
      3. upgrade DCs to new OS (all DCs need to be upgraded prior to raising functional level). Hopefully you don’t have hundreds of DCs.
      4. relocate FMSO roles if needed
      5. raise domain/forest functional level
    9. DEMO – extend schema
      1. adprep (link above)2012_adprep_cmd
      2. uses the stack of .ldf files where adprep resides
      3. remember you can view these attributes in the ad database using ADSI Edit.
      4. adprep
        1. first use /forestprep
        2. then /domain prep
        3. optionally /gpprep, and /rodcprep
      5. now raise the functional level
        1. ad domains and trusts
        2. cannot go backwords, this is a one way road.
      6. What’s new in the functional levels
      7. Creating new UPN suffix
        1. AD Domains and Trusts, UPN suffixes
        2. add what you want in AD D and T
        3. then in ADUC you can use them in the user account tab
  2. Configure Trusts
    1. Configure External, Forest, Shortcut, Realm
    2. Configure trust authentication
      1. Forest wide, or “selective”
    3. Configure SID filtering
      1. Get-ADUser  -filter * | select SAMAccountName,sid (returns SIDS for users)
      2. SID filtering is on my default in external trusts.
      3. used in domain object migrations (from domain to another)
      4. has to be turned OFF to migrate (only time you would do this)
      5. SID history has to be ENABLED to migrate objects, which requires turning off SID filtering. Example; move a user to different domain, if you don’t do this properly a new SID is created and they lose access to printers they used prior. With SID history ENABLED, user object retains a history of both SIDs
      6. Detailed explanation and example of disabling SID filtering, enabling SID history here.
    4. Configure Name Suffix Routing
      1. determine what name suffixes get passed / routed to other side of trust
    5. Fundamentals
      1. trusts have direction – trusting, vs. trusted
      2. the direction is opposite of the direction of access
      3. remember by “wing it” is ‘eng -> ‘ed.   From trustING to trustED.
      4. most are bi-directional
      5. can be transitive (if A trusts B, and B trusts C, then A trusts C)
      6. different types
        1. External from one domain in one forest to domain in a different forest
        2. Shortcut – literally a shortcut to another domain in same complex forest. Not common as AD simplifies
        3. Forest – between two forest roots; everything in forest is trusted. Transitive. Most common type of trust. Acquisitions. Always transitive. Can configure rules of authentication.
          1. Need name resolution to set up. Can be done by consolidating nameservices. In larger environment, conditional forwarders.
          2. create from AD Domains and Trusts
          3. can create both halves of trust from one side (one server)
        4. Realm trust – to non-AD Kerberos realm / Linux
  3. Configure Sites
    1. Created for AD replication across geographical locations
    2. Associated with subnets (VYOS router for lab)
    3. KCC (knowledge consistency checker)
    4. Configure Sites and Subnets
      1. rename “Default-First-Site-Name”, use it and create additional as needed
      2. create subnets and associate to sites
    5. Create and Configure Site Links
      1. Inter-Site transports
      2. most of the time is IP, NOT SMTP
      3. all sites are added to IP default site link
      4. absolute value of the cost is meaningless, only the RELATIVE value (compared to other links) has meaning
      5. A lot of this had more meaning when network connectivity was expensive and low capacity
    6. Manage Site Coverage
      1. you need a DC in each site
      2. are the DCs Global Catalogs (old times was limited due to processing power, bandwidth)
      3. now best practices are simply make every DC a GC
      4. if multiple DCs in a site, define a preferred BridgeHead server. Or leave this alone and leave it to KCC.
      5. best practice is leave it to KCC
    7. Manage Registration of SRV Records
      1. determines what DC site computers use
      2. ipconfig -registerdns make the DC set srv records
    8. Move DCs Between Sites
  4. Manage AD Replication and SYSVOL replication
    1. Upgrade SYSVOL replication to DFS-R (Distributed File System Replication)
      1. If you have an old, upgraded, AD, you might not be on DFS-R and still on the old FRS (File Replication Service)
      2. upgrading to DFSR
        1. three steps after get healthy, migrate to prepared state, migrate to redirected state, migrate to eliminated state
        2.  dfsrmig /?  (powershell for DFSR migration)
        3. dfsrmig /getglobalstate
        4. results will be “prepared”, “redirected”, or “eliminated”
        5. only do one step at a time then WAIT
        6. Some health check commands
          1. gwmi – class win32_logicaldisk – ComputerName yourcomputername (shows drive space)
          2.   repadmin /syncall /force /aped (forces domain sync and ignore all schedules)
          3. update-DfsrConfigurationFromAD
    2. Configure replication to RODCs
      1. single use case; unsecure branch location. only contains passwords and content for that branch
      2. never log onto RODC with privileged  account
      3. delegated RODC administrator (the selected group can administer the RODC (“managed by” tab)
    3. Configure password policy replication for RODCs
      1. set policy for which PWs you want to cache on RODC (password replication TAB)
      2. you can see what users/computers are replicated to RODC on “advanced” tab.
    4. Monitor and manage replication
      1. sites and services – right click and “replicate now” from AD Sites and Services
      2. repadmin /replicate server1 server2
      3. repadmin /showrepl
      4. repadmin /kcc
      5. repadmin /prp view servername reveal (shows RODC replication)
      6. in GPMC, look at a domain, you can see replication status
      7. dfsdiag
      8. nltest (tests if you can locate a DC)
      9. AD Change Notification (replicates to all sites instantly)
        1. ADSI edit
        2. sites
        3. “options”, from blank to “1”, now replicates across sites at same replication as intrasite replication.


Jun 14

Windows Server 2012 R2 (70-412) MCSA and the 70-412 Exam – Study Guide

These notes are my personal notes from the FREE training on Pluralsight. You can get your FREE signup through technet/MSDN or Dreamspark. The title of this course is exactly the title of this post. These notes are from this specific course only. I use these as a refresher Study Guide. POWERSHELL topics and 2012GregShieldscmdlets are in purple. I have a few notes with the “DEMO” each time the training included a DEMO just so you can see how many demos there were which were really helpful. Thanks to Greg Shields @ConcentratdGreg, the trainer, contact info at the end.

After doing the Advanced Features training, I’m expanding into the rest on Pluralsight and will go through as many as I can before my test date. This content should also apply to the 70-417. The 417 is the one I’m taking is a combination of 410, 411, and 412 all in one. It breaks down the score for each section. You have to pass all three sections. I have passed two of them (410 and 411) but not the 412, so if you fail one of them, you fail the entire test.

  1. An Introduction to the MCSA’s Final Exam2012Exams
    1. bunch of stuff about exam, objectives, strategy
    2. 417 is a combination of 410, 411 and 412
    3. Intended audience; ok.
    4. Without taking a bunch of notes, let’s just say review the exam objectives, just scroll down on the appropriate page for the specific exam you’re looking at;
      1. https://www.microsoft.com/learning/en-us/exam-70-410.aspx
      2. https://www.microsoft.com/learning/en-us/exam-70-411.aspx
      3. https://www.microsoft.com/learning/en-us/exam-70-412.aspx
      4. https://www.microsoft.com/learning/en-us/exam-70-417.aspx
    5. R2 specific information has  been included since January 2014.  So, while I don’t think you’ll have a lot of questions about the differences from 2012 and Server 2012 R2, I WOULD expect to know the new Server 2012 R2 features.
    6. Link on what is NEW in Server 2012 R2
  2. The next section is titled Building Your 70-412 R2 Environment 
    1. I’m going to put the next section in a new post focused on how to build a lab.